Follow the diagrams below to insert all heatsets.
| Link |
Quantity |
 |
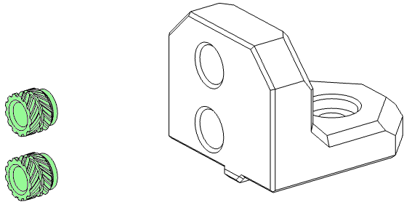
x4 |
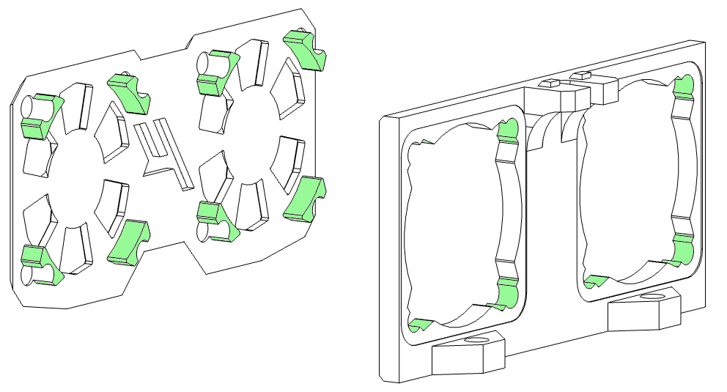
¶ Main Body
| Link |
Quantity |
 |
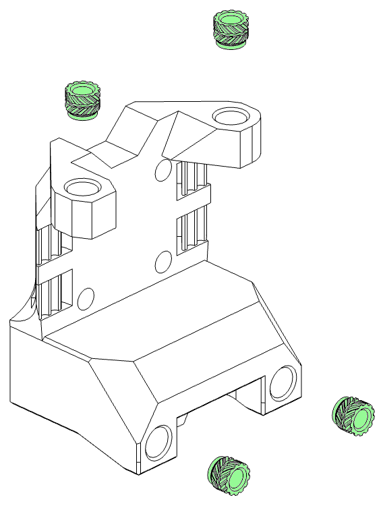
x2 |
 |
x2 |
| Link |
Quantity |
| |
x2 |
| |
x2 |
| Link |
Quantity |
| |
x2 |
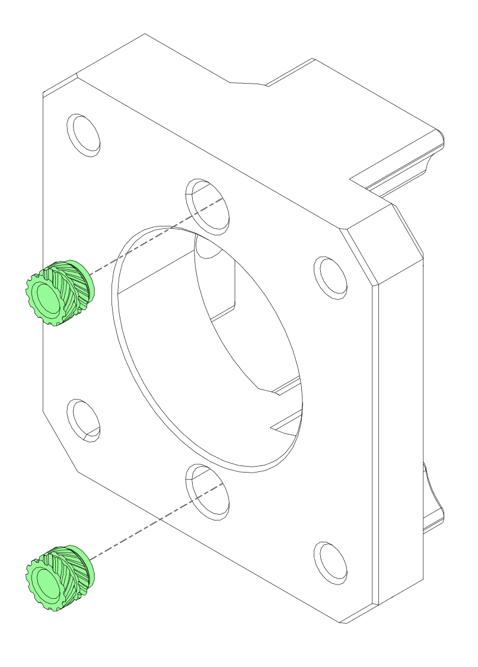
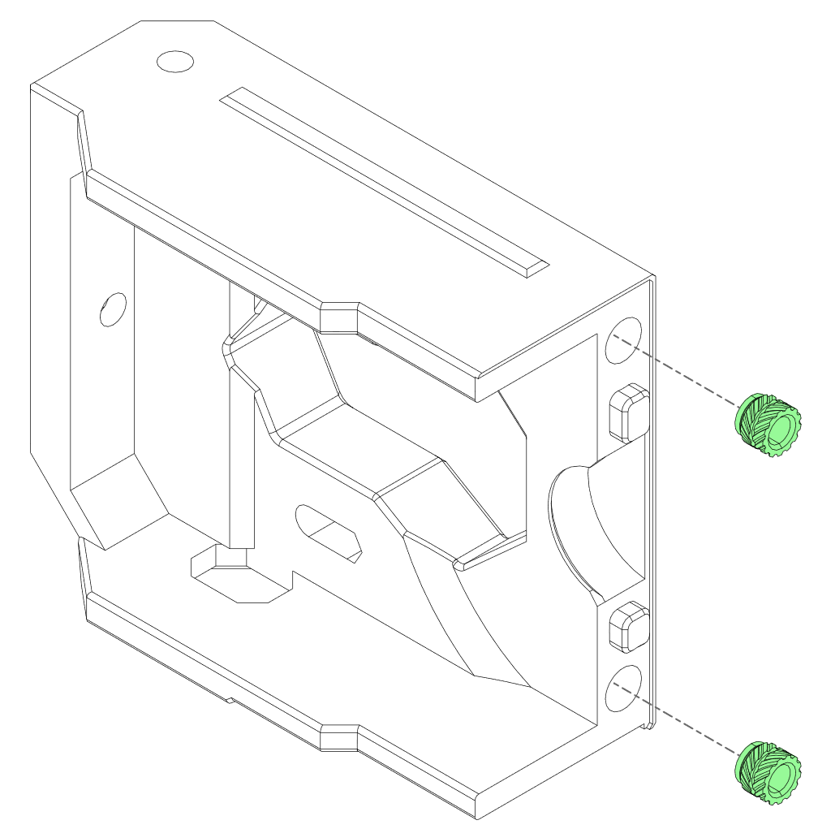
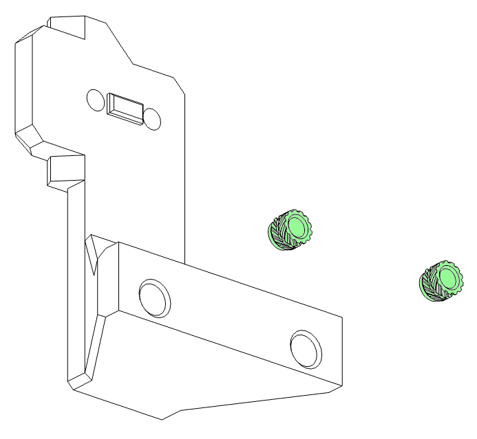
The image across shows the pinned
variant of the XY Joint lower, and the
links take you to the pinned variant of
the STL. If you are using screws in
place of pins, your part will look
slightly different with 2 additional
smaller holes.
| Link |
Quantity |
 |
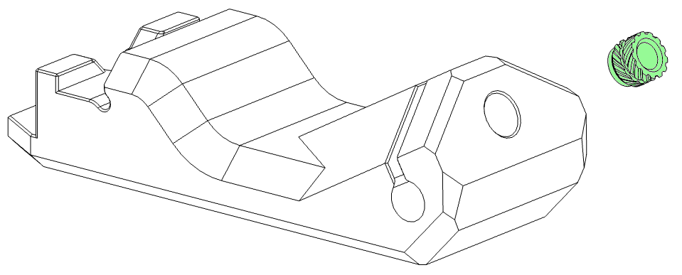
x1 |
 |
x1 |
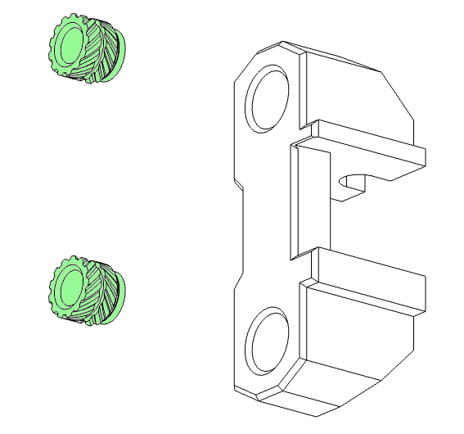
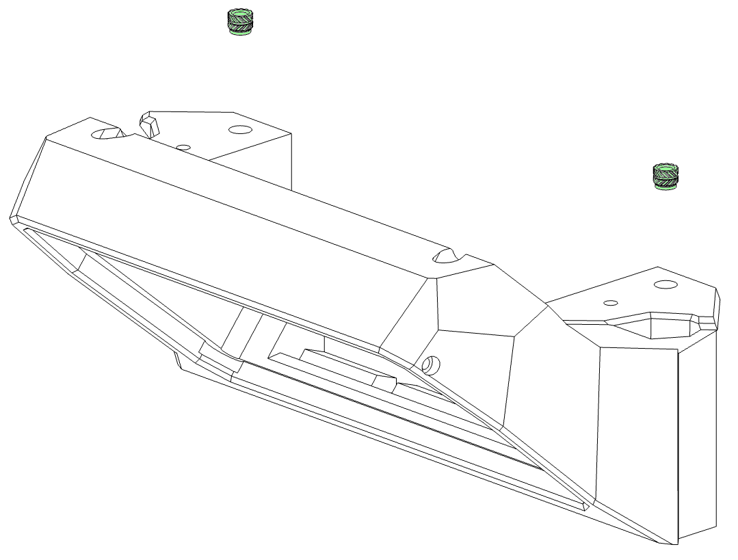
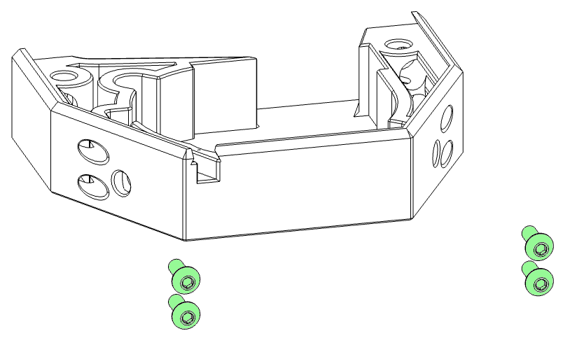
There are several variants of these 2 parts, in an
attempt to accommodate all manufacturers and
suppliers. They consist of 2 hole and 3 hole
variants that correspond to how many mounting
screws your Z-Chain uses.
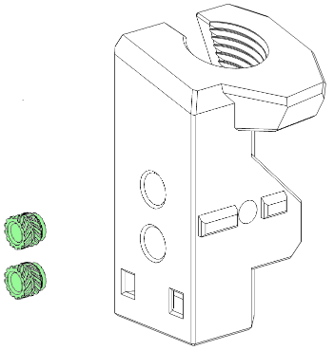
The upper mount then has several threads for
different cable glands.
Ensure you’ve printed the correct versions before
inserting any threaded inserts.
DEFAULT DECISION: 2-hole mounts are the go to — unless your Z chain supplier got creative. When in doubt, count the holes. The chain ones, not your emotional ones.
| Link |
Quantity |
| |
x1 |
| Link |
Quantity |
| |
x1 |
| Link |
Quantity |
| |
x1 |
| Link |
Quantity |
| |
x1 |
| Link |
Quantity |
| |
x2 |
THE 90’S CALLED, THEY WANT THEIR VISIBLE HARDWARE BACK
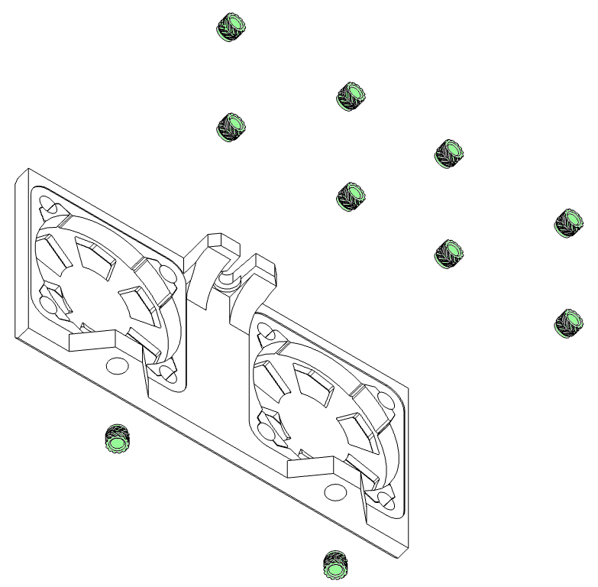
Before we can add the threaded inserts to the fan mounts, we need to bring the [a]_fan_grill and fan mount pieces together. They threaded inserts will then be used to fuse the 2x pieces together, for that stealthy, no hardware, aesthetic on the outside.
Make sure the [a]_fan_grill and fan mount pieces are nice and flush. Once you insert these threaded
inserts, there’s no going back! (Well technically, you could try and remove them, but who wants that gooey mess in their nice new printer?
| Link |
Quantity |
| |
x2 |
| |
x2 |
| Link |
Quantity |
| |
x2 |
| |
x2 |
| Link |
Quantity |
 |
x1 |
 |
x1 |
PICK ONE, DON’T BE GREEDY
The headless front skirt option should only be used if you aren’t using a display. Don’t use both, as one of them will sit lonely in the drawer with all the other printed parts you have in there.
DEFAULT DECISION: No display collecting dust in the drawer?? Headless front keeps it sleek and mysterious — like Batman, but with more extrusion profiles. You can always slap a screen on later when your commitment issues resolve.
| Link |
Quantity |
| |
x1 |
| Link |
Quantity |
| |
x1 |
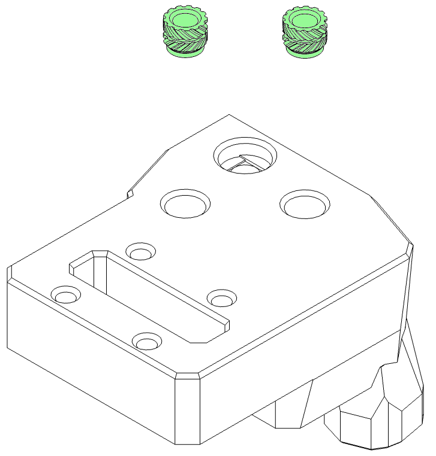
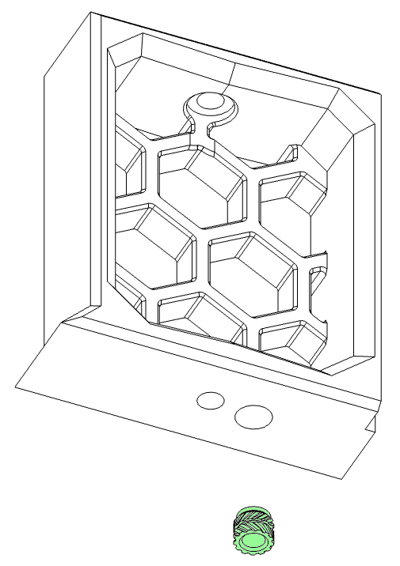
Erm, these aren’t threaded inserts…?
You’re absolutely right! 10 points for observation!
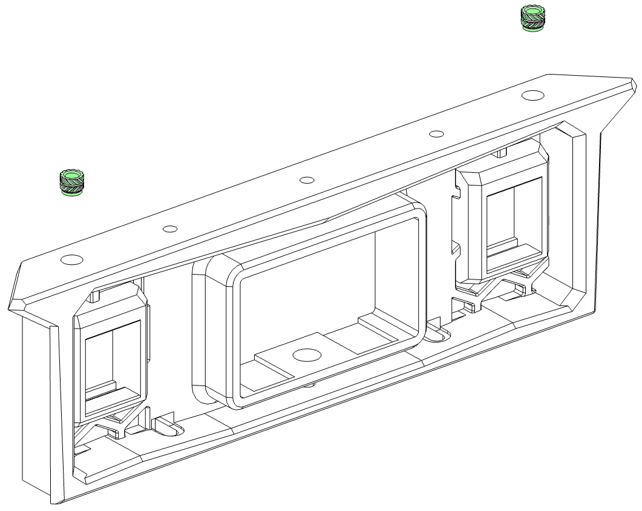
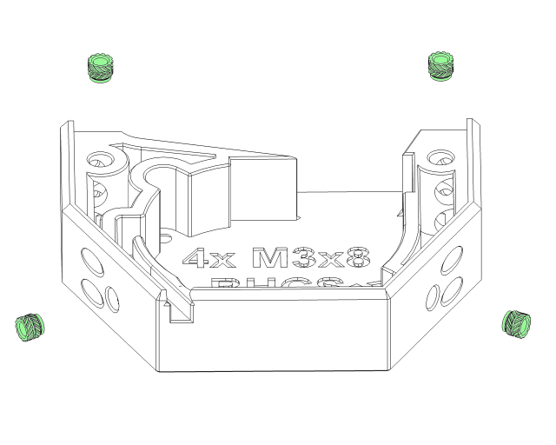
Before we can put in the threaded inserts, we need to install these 4x M3x8 BHCS first, otherwise we won’t be able to install them once the threaded inserts are in
place.
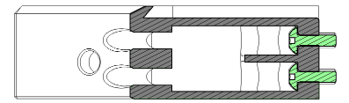
Insert the screws through the holes on the rear of the Plenum.stl, thread them through the part so they stick out the front (as demonstrated in the cross section image below).
These 4x M3x8 BHCS need to be magnetic as the chamber connects to them. Please check with a magnet to prevent any future disappointment.
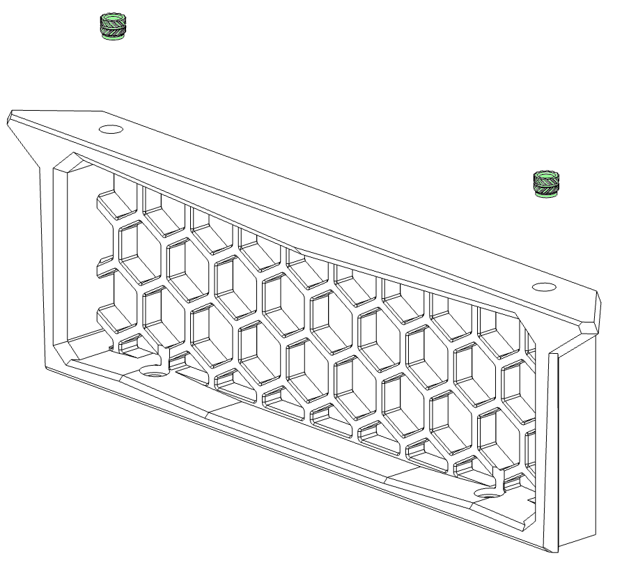
The below 2x heatsets on the top only have a small are to grip to. Go slow and steady with these ones.. You don’t want to push them all the way through into the void.
MAKE SURE YOU HAVE PLACED THE SCREWS IN PLACE BEFORE INSERTING HEATSETS!
| Link |
Quantity |
| |
x1 |
Next step is assembling the frame!